

“Untar” is a common term in the Linux world, referring to the process of extracting files and directories from a tar archive. However, there is usually no command named untar. Instead, we use the tar command with various options.
Tar files, or Tape Archive, are my go-to for grouping many files into one. They can also be very handy for backups and can be compressed like zip and other compression formats.
If you work a lot with Linux or other Unix-based systems, you need to know your way around the tar command. In this article, I’ll show you everything from basic to advanced techniques for untarring. After reading it, you should be able to untar a file as well as know your way around the tool.
Different Types of Tar Files
Tar files, recognized by the .tar extension, can come in various forms, depending on their compression method. So to untar a file, you will need to recognize what type of file it is. Here are the most common types:
- .tar: The basic tar file with no compression.
- .tar.gz or .tgz: A tar file compressed using gzip, offering decent compression.
- .tar.bz2 or .tbz: This uses bzip2 for compression, generally providing better compression than gzip.
- .tar.xz: Compressed with xz, known for excellent compression ratios.
Recognizing these types will help you understand how to untar them appropriately.
Untar File
To untar a file in Linux, use the tar command. To untar a basic tar file with no compression, use the following example:
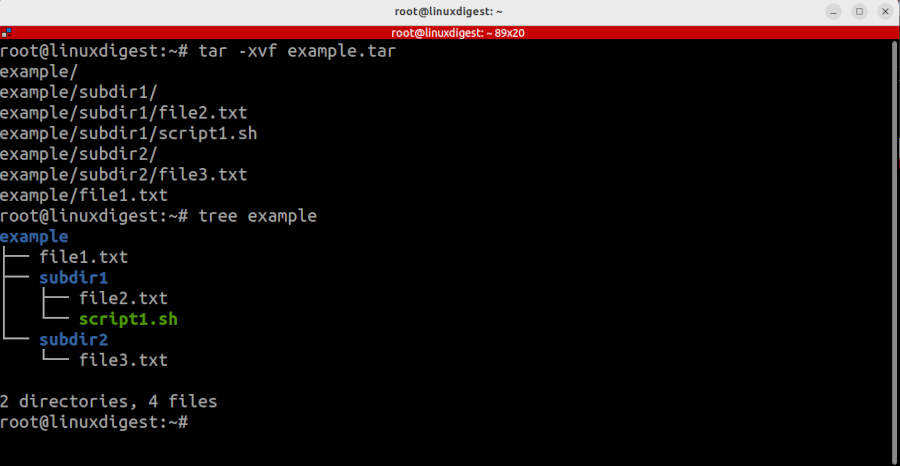
tar -xvf file.tar
The options we are using in the command are as follows:
- -x: Extract files from an archive.
- -v: Verbosely list files processed. This is optional, but I always do it anyway.
- -f: Use the filename that follows.
As you can see in the screenshot above, the tar command extracted all the files into the current directory and created all subdirectories that were in the archive.
In this example, the file had no compression. As I mentioned above, many tar files are also compressed. To uncompress the file check the file extension to see the type. For different file types, add the corresponding decompression option:
For files ending with .tar.gz add the -z option:
tar -xzvf file.tar.gz
For files with the .tar.bz2 or .tar.tbz extensions, we add the -j option:
tar -xjvf file.tar.bz2
For files ending with .tar.xz, the -J option does the trick:
tar -xJvf file.tar.xz
Untar to a Specific Directory
In the previous examples, the contents were extracted to the current directory we were in. We can easily tell tar where to put the files if the current directory isn’t the correct place. For this purpose, we will use the upper case -C option or –directory. In this example, we will extract everything to the /tmp directory:
tar -xvf example.tar -C /tmp/
As before, we will need to specify if the file is compressed. Here the file has a .tar.bz2 extension, so we will add the -j option:
tar -xjvf example.tar.bz2 -C /tmp/
Untar a Specific File from an Archive
Sometimes you may only need one specific file from the archive. Extracting all the files just to get that one file may be a bit too much in that case. To get just one specific file from the archive, just add the path to the file to the end of the command line argument. Here we will just get the file example/file1.txt:
tar -xvf example.tar example/file1.txt
Remember to add the correct compression option if it is a compressed file. If the file has a .tar.gz extension, we will add the -z option to the command line:
tar -zxvf example.tar.gz example/file1.txt
If you need more than one file, you can add more filenames to the command. Like so:
tar -xvf example.tar example/file1.txt example/subdir1/file2.txt
If we have multiple files we want to extract, we can also use wildcards. Wildcards are not regex compliant but are similar to globs that are used in most shells like bash. The option we use here is –wildcards. Here we are extracting any file that matches ‘*file1*’.
tar -xvf example.tar --wildcards '*file1*'
Remember to use single or double quotes around the glob expression. Otherwise, your shell might try to interpret the expression as something else before executing the command. If you get an error like this, you most likely forgot to add the quotation marks:
tar: file1.txt: Not found in archive
tar: Exiting with failure status due to previous errors
Exclude Specific Files
The inverse is also true. You can exclude files when untarring. For this, we will use the –exclude option and extract everything except the example/subdir2 directory:
tar -xvf example.tar --exclude=example/subdir2
You can even use the * character (asterisk) to match multiple files. Let’s try if we can skip anything that contains file1 in it’s path:
tar -xvf example.tar --exclude="*file1*"
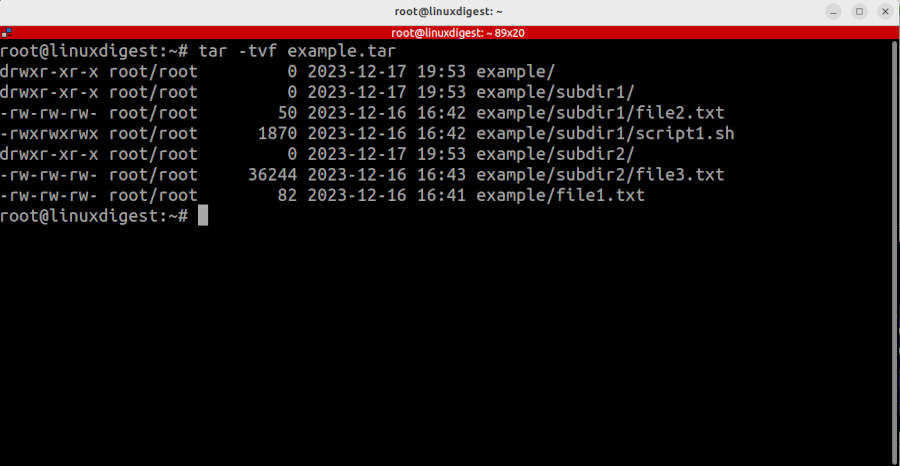
List Files in a Tar File
Before you extract a tar file or specific file from it, you would need to know what is inside it. You can actually get the whole list of files without extracting them. To do this, we remove the -x option and add the -t option:
tar -tvf example.tar
This will output a file listing similar to what you would see in the output of the ls command.
Create a Tar File
Now we know how to untar an archive. Let’s attempt to create a file ourselves. To do that, we will replace the -x option with -c.
To create a basic tar file, use the following command:
tar -cvf archive_name.tar /path/to/directory
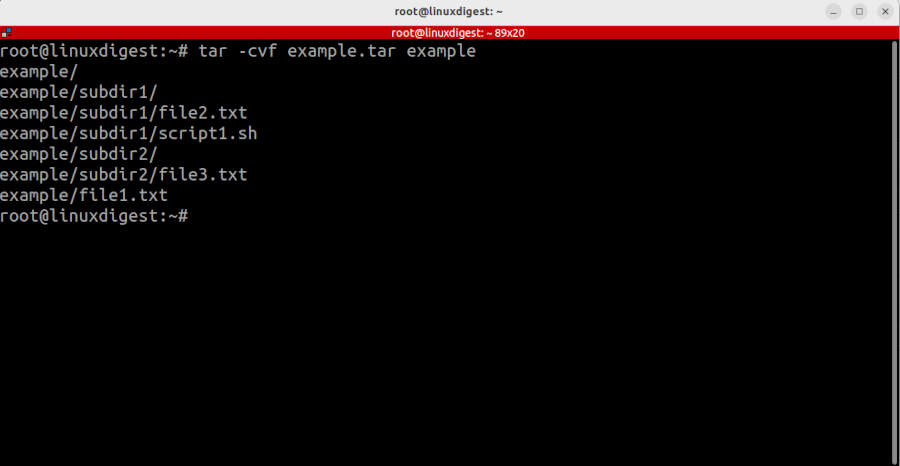
The options used are the same as before. Except for the -c option:
- -c: Create a new archive.
- -v: Verbosely list files processed (optional).
- -f: Filename for the created archive.
This will create a basic tar file with no compression. To create a tar file with compression, we use the same compression options as when decompressing:
For files ending with .tar.gz add the -z option:
tar -czvf file.tar.gz /path/to/directory
For files with the .tar.bz2 or .tar.tbz, lower case -j option:
tar -cjvf file.tar.bz2 /path/to/directory
For files ending with .tar.xz, upper case -J option:
tar -cJvf file.tar.xz /path/to/directory
Use Untar Instead of Tar
If you would rather not remember that the -x option stands for extract you can always create an alias so the untar command will work. Something like this would do the trick:
alias untar='tar -xvf'
Now you can untar a file with a much shorter command like this:
untar example.tar
To make the alias permanent, just add it to your .bashrc file and then reload it:
echo "alias untar='tar -xvf'" >> ~/.bashrc
source ~/.bashrc
Now Go Do It!
You should be able to handle most of the common tasks you would have to do with tar files. As I mentioned in the beginning, tar files are very common in Linux administration. You are also likely to have to deal with these files in all other Unix-like systems, such as MacOS, BSD, etc.